

How to install a motocross graphics kit? KUTVEK installation guide
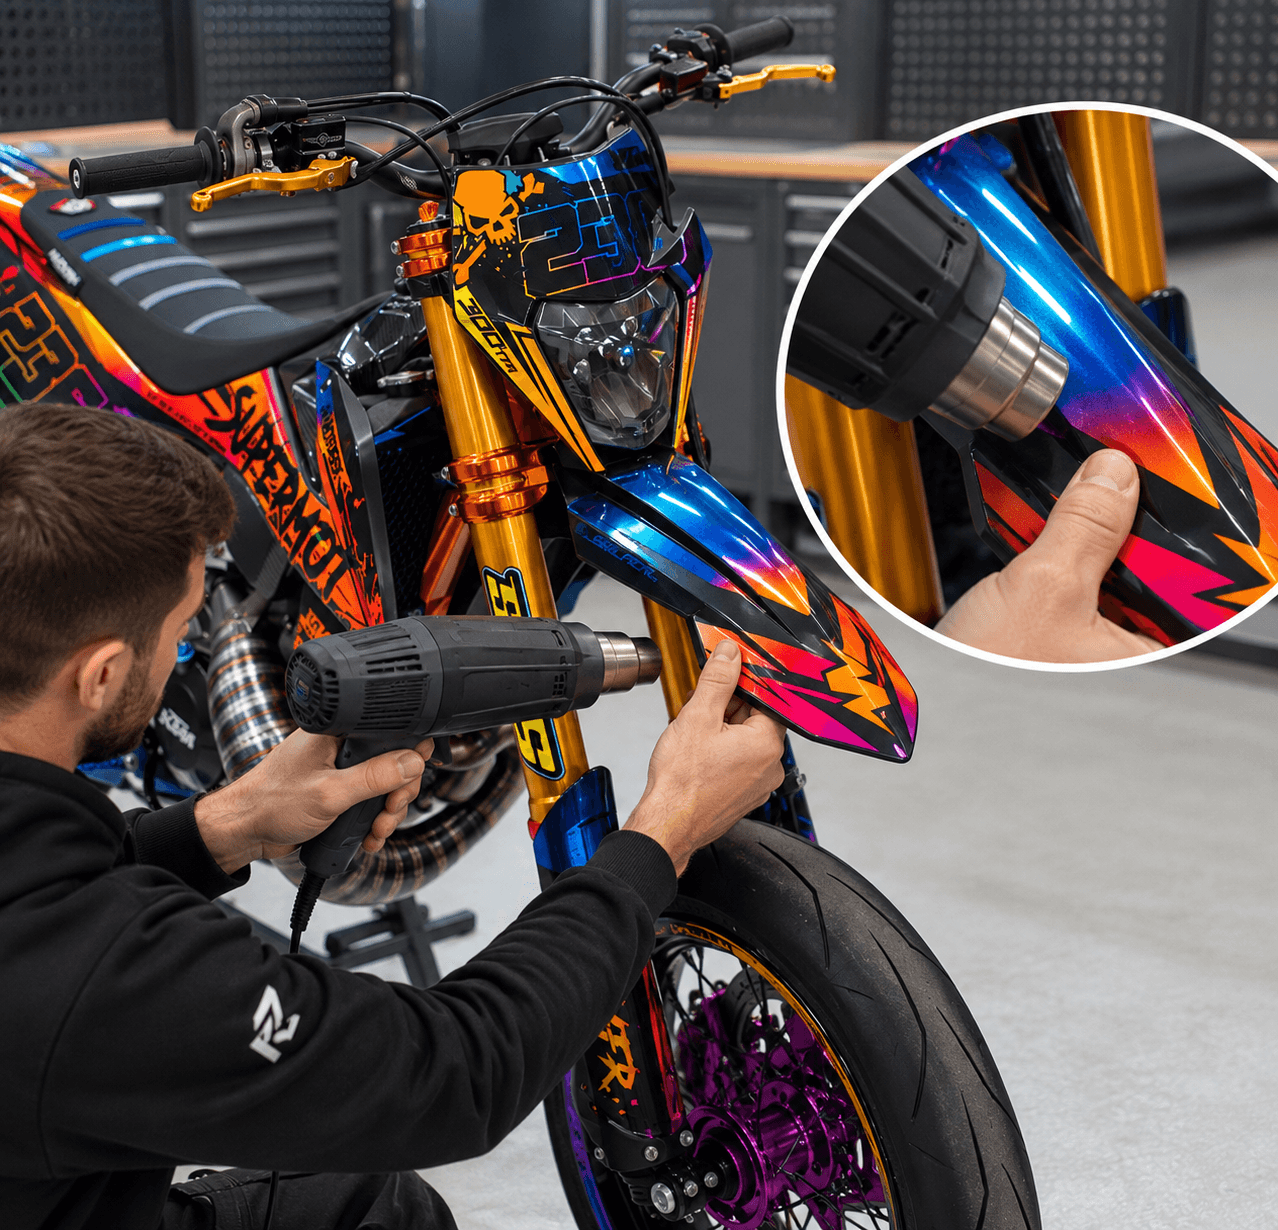
Learn how to properly install a KUTVEK graphics kit. Preparation, heating, application, and especially post-heating the edges for optimal adhesion.
How to Properly Install a KUTVEK Decal Kit? The Method for a Perfect Fit
Installing a motocross, enduro, quad, SSV, or motorcycle decal kit requires some method. Proper preparation ensures a clean result without bubbles or wrinkles, but most importantly, excellent long-term adhesion.
At KUTVEK, we particularly emphasize a step that is too often overlooked: once the kit is fully installed, it is essential to heat and firmly press around the entire edge of each piece.
This final step ensures the adhesive works effectively on sensitive areas: corners, curves, contours, and edges of the plastics.
Before Starting: Properly Prepare the Plastics
The quality of the installation largely depends on preparation.
Before applying your KUTVEK decal kit:
- remove the plastics if it makes installation easier;
- thoroughly clean each part;
- remove dust, grease, cleaning product residues, and old adhesive remnants;
- ensure the surface is completely dry before starting.
The plastic must be clean, dry, and perfectly degreased.
Avoid installing a decal kit on cold, wet, or freshly cleaned plastic that leaves a greasy film.
Test Fit the Piece Before Applying
Before fully removing the backing from the sticker, take a few seconds to test fit the decal on the plastic.
Pay special attention to:
- contours;
- mounting holes;
- corners;
- raised areas;
- alignment with adjacent parts.
This step prevents starting the installation with poor alignment.
Start with a Central Area
To install a decal kit cleanly, it’s best to start with a relatively flat and central area.
Apply the sticker gradually, working from the center outward.
Press with your fingers or a suitable squeegee to remove air as you go.
Don’t try to apply the entire piece at once.
For large bodywork parts, take your time and work progressively.
Apply Light Heat in Complex Areas
Motocross and enduro plastics have many contours and curves.
In these areas, you can lightly heat the vinyl to soften it and make it easier to shape.
For example, use:
- a hairdryer;
- or a heat gun used very carefully, at low power and from a safe distance.
The goal is to soften the material, not to burn or warp it.
Moderate heat helps the sticker conform more easily to the plastic’s shape.
The Most Important Step: Heating After Installation
This is the point we particularly want to emphasize.
When your KUTVEK decal kit is 100% installed and properly positioned, the job isn’t done.
Now you need to perform what’s called post-heating.
Heat and Press Around the Entire Edge of Each Piece
Work progressively on:
- all edges;
- all corners;
- curved sections;
- recessed areas;
- highly contoured zones;
- holes and mounting points.
Apply light heat, then press firmly with your fingers.
This must be done around the entire perimeter of each decal piece.
It’s not enough to quickly heat the entire sticker.
The most important part is working precisely on the last 5 to 10 millimetres along the edges, as these are typically the areas under the most stress.
Why Is Heating the Edges Absolutely Necessary?
When vinyl is applied to curved plastic, the adhesive is under tension.
Without post-heating, some areas may try to return to their original shape.
Over time, this can cause:
- edges lifting;
- small bubbles;
- peeling in corners;
- or poor adhesion on highly contoured areas.
Heating and firmly pressing the edges improves contact between the adhesive and the plastic.
This step is especially important for motocross and enduro bikes, which face:
mud, water, pressure washing, boots, knee braces, friction, and temperature variations.
The Right Technique
Once the sticker is applied:
1. Lightly heat a small area.
2. Immediately press firmly with your thumb or fingers.
3. Hold for a few seconds.
4. Work progressively around the entire edge.
5. Repeat for each piece of the kit.
Take a few extra minutes to do this step properly.
It’s far more important for the kit’s longevity than rushing to finish the installation.
Don’t Neglect the Corners
Corners are often the first areas to peel when a decal kit hasn’t been properly worked after installation.
Pay extra attention to:
- sharp points;
- edges under the plastics;
- areas near the engine;
- pronounced curves;
- vents and scoops;
- side panels;
- fenders.
For highly contoured parts, you may repeat the sequence several times:
heat → press → let cool.
Caution with Pressure Washers
Once your kit is installed, avoid directing a pressure washer nozzle directly at a sticker’s edge.
High pressure sprayed under an edge can naturally encourage peeling.
When washing, maintain a reasonable distance and direct the spray along the direction of the adhesive, rather than directly at the edges.
How Long to Wait Before Riding?
After installation, it’s best to let the decal kit settle so the adhesive can gradually reach optimal bonding strength.
Whenever possible, avoid installing your kit immediately before:
- a race;
- washing;
- a muddy ride;
- or transport in the rain.
An installation done in a clean, temperate environment, followed by a resting period, will always yield better results.
Mistakes to Avoid When Installing a Decal Kit
Adhesion issues are usually due to a few simple mistakes:
- installing the kit on poorly degreased plastic;
- working in a too-cold environment;
- overstretching the sticker;
- trapping air in highly curved areas;
- not pressing firmly enough on edges;
- skipping post-heating;
- washing the bike immediately after installation.
Among these, failing to heat and press the edges after installation is one of the most critical mistakes to avoid.
The KUTVEK Rule to Remember
If you only remember one thing from this guide, it’s this:
Once your decal kit is fully installed, heat and press firmly around the entire edge of each sticker.
Take a few extra minutes and go around each piece completely.
It’s the final step of installation, but also one of the most important for long-lasting adhesion.
FAQ – Installing a KUTVEK Decal Kit
Should You Heat a Decal Kit During Installation?
Yes. Light heating makes installation easier on curves and contours. But the most important part is heating the kit again once fully installed, especially on edges and corners.
Should You Heat the Edges of a Decal Kit?
Yes, absolutely. Once the sticker is positioned, heat and press firmly around its entire edge to optimize adhesion.
Why Is My Decal Kit Peeling at the Corners?
The most common causes are a poorly degreased surface, too-low installation temperature, or—most importantly—insufficient pressure and post-heating on curved areas and edges.
Can You Use a Hairdryer to Install a Decal Kit?
Yes. A hairdryer works well for gentle, controlled heat. A heat gun can also be used but with much more caution.
Can You Wash the Bike Right After Installing a Decal Kit?
It’s best to wait to allow the adhesive to bond properly before exposing the kit to water, mud, or pressure washing.
How to Make a Motocross Decal Kit Last?
Good adhesion depends mainly on proper plastic preparation, tension-free installation, and—most importantly—post-heating with firm pressure on edges and corners.