

How to remove an old motorcycle deco kit without damaging the plastics? Follow these steps to peel off the vinyl, clean the adhesive residue and prepare for installation.
How to Remove an Old Motorcycle Decal Kit Without Damaging the Plastics
Changing your motorcycle's decal kit is one of the easiest ways to give it a fresh new look. But before installing new graphics, one step is essential: properly removing the old decal kit without damaging the plastics or fairings.
On a motocross bike, enduro bike, 50cc, or ATV, decals can stay in place for several years. Over time, the adhesive bonds strongly to the surface and the vinyl can become more difficult to remove.
Should you heat the decals? How to remove adhesive residue? What products to use before applying a new kit?
Discover KUTVEK's tips to perform this task cleanly and prepare your vehicle for new graphics.
Why Carefully Remove Your Old Decal Kit?
A quality decal kit is designed to withstand the demands of motorsports: debris, mud, friction, washing, and temperature variations.
This durability also means strong adhesion to the vehicle's surfaces.
When you want to change your graphics, it's essential not to rip off the decals abruptly.
A poor removal method can cause several issues: torn vinyl, stubborn adhesive residue, scratches on plastics, or damage to painted surfaces.
A careful removal also makes installing the new kit easier.
To understand how to preserve your graphics as long as possible, check out our article on how long a motorcycle decal kit lasts.
What Tools to Use to Remove a Motorcycle Decal Kit?
Before starting, prepare your workspace.
Ideally, work in a clean, dry, and adequately tempered area.
A hairdryer, soft cloths, a microfiber towel, and a suitable surface cleaner make a good starting point.
A soft plastic spatula can help lift an edge, provided it doesn't scratch the surface.
Avoid metal tools, blades, and rigid scrapers in direct contact with the fairings.
The goal is to gradually remove the vinyl while preserving the underlying surface.
Step 1: Clean the Bike Before Removing Decals
Before peeling off your old decal kit, take time to clean the surfaces.
On a motocross or enduro bike, dust, sand, and mud can accumulate around the decals.
If these particles remain during removal, they may cause scratches when rubbed against the plastics.
Cleaning with water and a mild product removes most impurities.
Rinse thoroughly and let the bike dry before proceeding.
For proper techniques, see our guide to maintaining and cleaning motorcycle decal kits.
Step 2: Gently Heat the Old Decal Kit
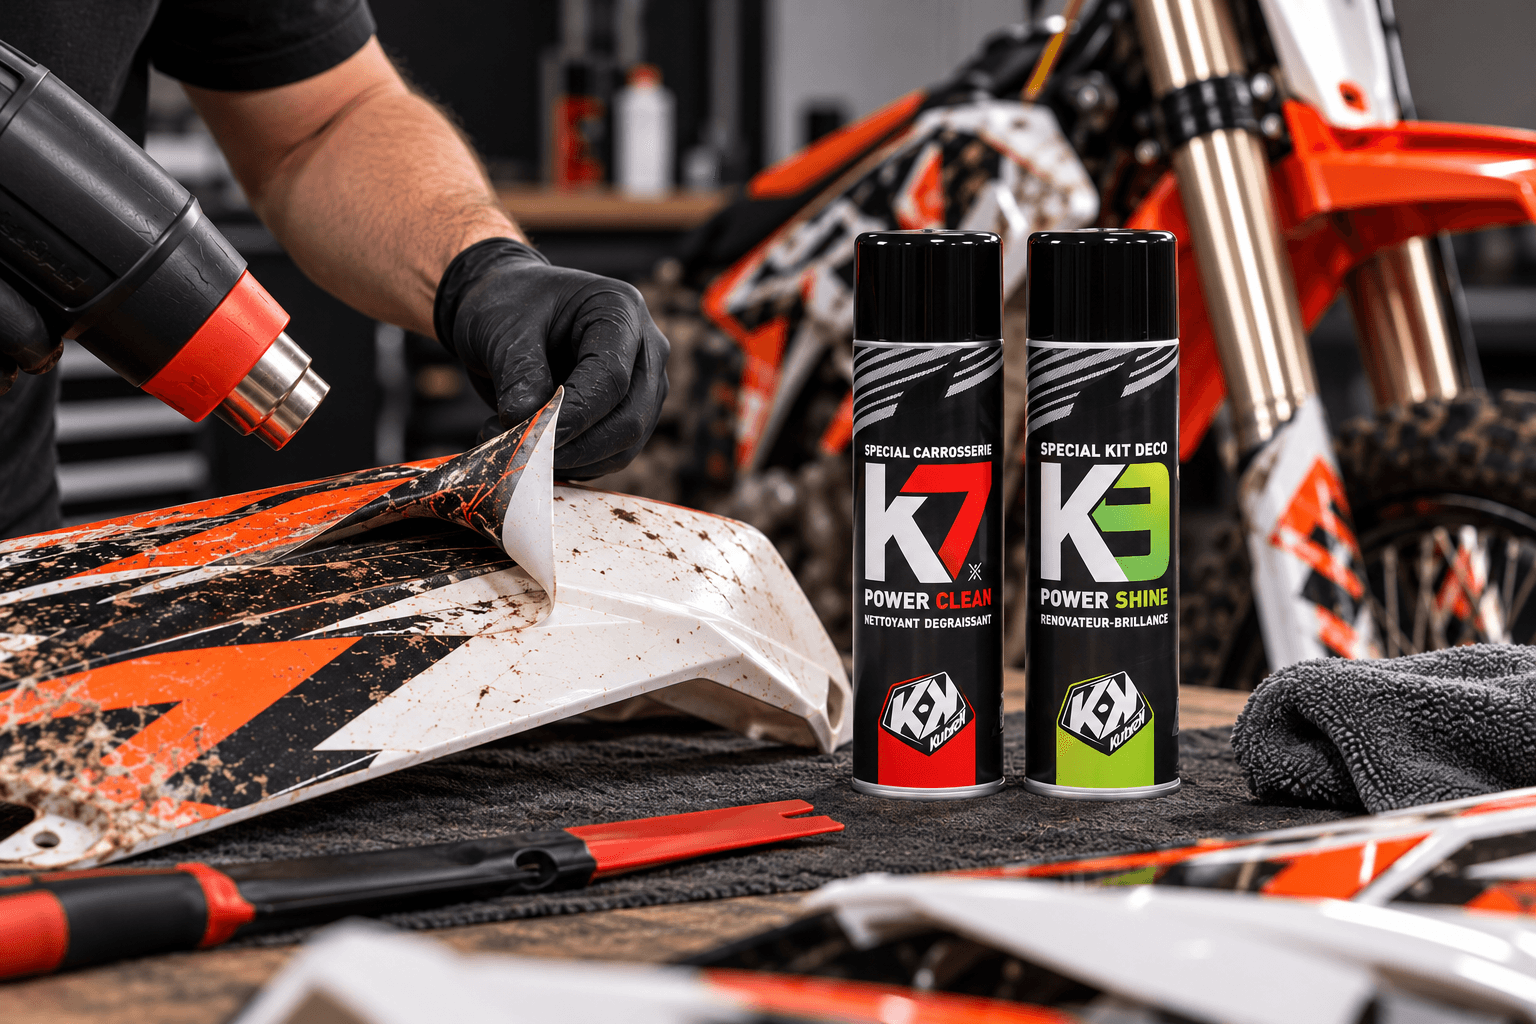
Heat is generally helpful for removing decals.
It softens the vinyl and can loosen the adhesive.
Should You Use a Hairdryer or Heat Gun?
For at-home removal, a hairdryer is often the simplest solution.
It provides gradual, easier-to-control heat.
A heat gun produces much higher temperatures. Improper use may warp plastics, damage paint, or weaken certain parts.
Prefer gentle, controlled heating.
How to Properly Heat the Vinyl?
Start by lightly heating a small area, keeping the heat source moving.
Don't concentrate heat too long in one spot.
When the vinyl becomes pliable, try lifting a corner gently.
If the decal resists, continue heating gradually rather than forcing it.
Step 3: Gradually Peel Off the Decal Kit
Once a corner is lifted, you can start removing the vinyl.
The principle is simple: proceed slowly, without yanking abruptly.
Why Avoid Pulling Too Hard?
Excessive force may tear the decal.
It can also stress fragile paint or already damaged surfaces.
To minimize risk, maintain steady tension by gradually folding the vinyl back on itself rather than pulling perpendicular to the fairing.
If the material becomes hard to remove, stop and reheat the area slightly.
What If the Decal Kit Tears?
An old decal kit may fragment, especially after prolonged sun exposure.
In this case, don't try to rip off remaining pieces.
Resume removal gradually, lifting sections one by one.
This may require patience but better preserves the plastics.
Step 4: Remove Adhesive Residue from Plastics
After removing decals, adhesive traces may remain on the fairings.
These residues must be eliminated before installing new graphics.
What Product to Use for Adhesive Removal?
Use only a product compatible with the material.
Some harsh solvents may dull plastics, damage paint, or harm varnished surfaces.
Always follow manufacturer recommendations and test first on a small inconspicuous area.
KUTVEK's K7 Degreaser is designed to clean bodywork and remove various contaminants, including grease, silicone, and some adhesive traces.
It can prepare surfaces before applying a new decal kit, per product instructions.
Discover the KUTVEK K7 Degreaser.
How to Know If All Adhesive Is Removed?
The surface should be clean, with no sticky residue or visible deposits.
Gently wipe affected areas with a clean microfiber cloth.
If some parts remain tacky, continue cleaning with a method suited to the surface.
Never apply a new decal kit directly over adhesive residue.
Step 5: Prepare Plastics Before New Decal Kit
Once old vinyl is removed, surface preparation becomes crucial.
Even when plastics seem clean, they may retain traces of grease, silicone, or maintenance products.
These substances can reduce the new kit's adhesion.
Why Is Degreasing Essential?
A decal kit must adhere directly to a properly prepared surface.
A greasy film may cause edges to lift or create adhesion flaws.
Thoroughly clean and degrease plastics, then let them dry completely.
KUTVEK recommends using the K7 Degreaser for this step.
See detailed recommendations in our FAQ on preparing and applying decal kits.
Step 6: Install Your New Motorcycle Decal Kit
Your bike is now ready for new graphics.
Before starting, verify the kit matches your exact model and year.
Fairing shapes can change between generations, even if the bike's commercial name stays the same.
Test-fit each piece on its corresponding surface to check positioning.
Apply gradually, working from the center outward.
Light heating can help with curves, while proper post-heating secures edges.
For successful application, consult our complete guide to installing KUTVEK motocross decal kits.
Also see 5 mistakes to avoid when installing graphics kits.
When Should You Replace Your Motorcycle Decal Kit?
There's no universal timeline for replacing a decal kit.
It depends on use, exposure, and condition.
A motocross racer regularly riding in mud and sand doesn't stress graphics the same as a roadster owner mainly using their bike on pavement.
Some replace their kit after a racing season, others keep the same graphics for years.
Replacement may be worthwhile when colors fade, parts are heavily scratched, or edges start lifting.
It can also reflect a simple desire for change.
Must You Replace the Entire Kit?
Not necessarily.
If only one piece is damaged, you may be able to replace just that element.
At KUTVEK, our team can assess reproducing individual pieces based on the original order and model.
This may avoid replacing otherwise good graphics.
FAQ: How to Remove and Replace a Motorcycle Decal Kit?
How to Easily Remove a Motocross Decal Kit?
The method involves cleaning the surface, gently heating the vinyl, then peeling it off gradually. Steady tension minimizes tearing and stress on plastics.
Can You Remove a Decal Kit Without Heating?
Sometimes possible, but removal may be harder. Moderate heat usually helps soften vinyl for easier removal.
Can a Hairdryer Damage Plastics?
Yes, if heat is excessive or applied too long in one spot. Work progressively and avoid overheating.
What Product to Remove Adhesive Traces?
Use a product compatible with the surface. KUTVEK's K7 Degreaser can help eliminate some adhesive traces and prepare surfaces for new application.
Can You Apply a New Decal Kit Over the Old One?
Not recommended. For optimal adhesion and clean finish, remove old graphics, then thoroughly clean and degrease surfaces.
How Long to Wait Before Applying the New Kit?
No single timeframe after removal. Key is ensuring surfaces are perfectly clean, dry, degreased, and at suitable application temperature.
Give Your Bike a New Identity with KUTVEK
Removing an old decal kit is key to successfully customizing your motorcycle.
With controlled heating, gradual removal, and proper cleaning, you prepare plastics to receive new graphics under optimal conditions.
Whether you ride motocross, enduro, 50cc, or street, KUTVEK offers many collections to transform your vehicle's appearance.
Discover KUTVEK motocross decal kits and choose your next graphics.
To go further, you can also create your 100% custom decal kit with KUTVEK.